GUIDELINES: Part I
general
The guidelines for HOL Graphics Camp will be worked on pixlr.com. It was chosen due to the fact that it's a free online program and it includes the most common features that you can find in other image manipulating programs as well. For example, Photoshop, CorelDRAW, GIMP, and many others that you are free to work with.
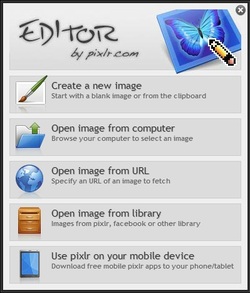
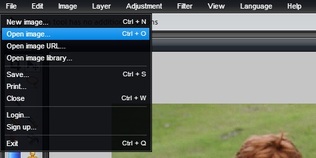
The first thing to do is go to www.pixlr.com and click on PIXLR EDITOR, so it can direct you to the program. Now you see the EDITOR pop-up window. The options you will probably use are: Create a new image or Open Image from Computer.
Create a new image
This is the option in which you will create an image entirely from scratch. You will get to choose dimensions from a list, or insert your own.
Open image from Computer
This is an easier option to create graphics from a picture you already have.
Explanation of basics.
Basics
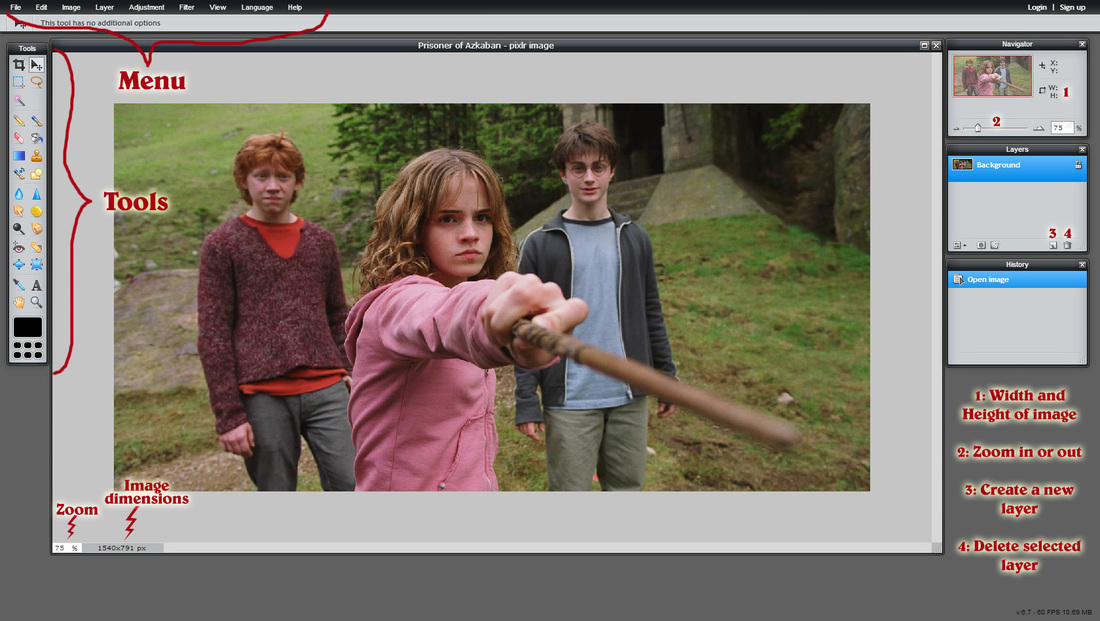
Pixlr, like almost every graphic design program, is consisted of some basic things. First of all, there's the Menu bar (like all windows or programs) with the submenus. Feel free to navigate them and "play" with those options during your designing process.
Then, there are the design tools on the left side and the Navigator, Layers and History windows on the right side. The Navigator can help you to zoom in and out of your picture (you can always zoom in or out by holding Alt button and scrolling with your mouse).
The Layers are those which help us design many elements but still be able to process every single one of them separately. The elements of the top layer are always above the elements of the layers under it. You can delete a layer by clicking on the bin at the right down corner of the layer window. You can create a new layer by clicking on the square button next to the bin. By right-clicking a layer, you can see many options, like Duplicate, Merge or Layer Styles. But we will discuss more about Layers later.
In the History window you can see your actions and you can always go back, if you don't like your result. It's like an Undo button, only with details. But be careful, History doesn't save all of your previous actions, if they are too many.
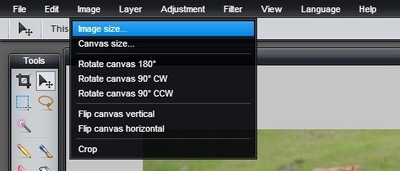 Image Size and Rotate.
Resize
You can always check or change your image's size by clicking on Image -> Image Size from the Menu.
Rotate
You can rotate the whole picture by clicking on Image -> Rotate Canvas as you want.
You can always check or change your image's size by clicking on Image -> Image Size from the Menu.
Rotate
You can rotate the whole picture by clicking on Image -> Rotate Canvas as you want.
Layers
Rules that apply regarding layers:
- The layer on top is always above the others in your picture.
- The tick on the right of each layer says if it's visible or not. Checked means visible, unchecked means invisible. It's still there, but invisible.
Merging Layers: If you want to merge two or more layers, you can (a) Right-Click on the first layer -> Merge Down, then Right-Click on the next layer -> Merge Down, and so on, until they are all merged (this merges the first layer with the one under it). Or (b) Right-Click on the Background layer -> Flatten Image and all layers are merged automatically. Or (c) if you want to merge some specific layers that are not the one above the other, you only check the ones you want to be merged (there's a tick on the right of each layer, which you can check or uncheck) and Right-Click on one of them -> Merge Visible. This option merges only the visible layers.

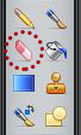
Crop
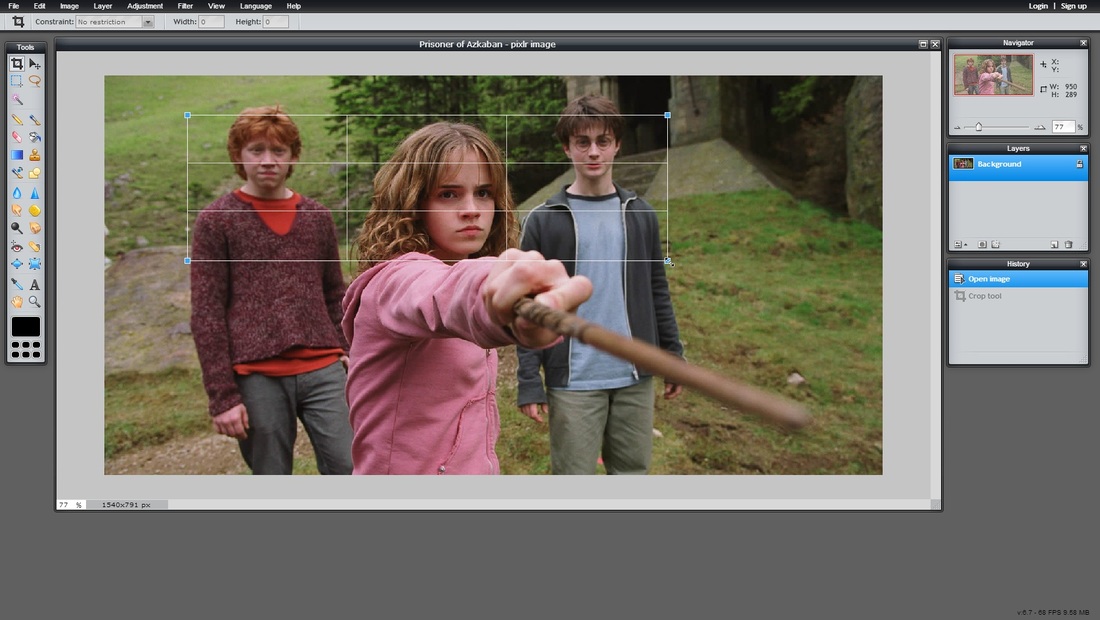
Let's say you have a picture and you want to cut a part of it in specific proportions or as you like. The Crop button (in the dotted circle on the left image) is perfect for this job. You click on Crop and then you form an area you want to cut out. Now you see the area and you can either move it or change the size of it by hand, or you can add specific proportions of the cropped area. In the Navigator, on your right, you see W (Width) and H (Height) changing as you alter your cropped area. When you finish on your cropped selection, you press Enter and you're done. But remember, this width and height is relevant to the picture's size. For example, let's say you wanted to crop the three faces of the image (Harry's, Ron's and Hermione's) in dimensions: W250 x H100. When you form your cropped area (the three faces), you would see that the width and height are not W250 x H100.
Let's say you have a picture and you want to cut a part of it in specific proportions or as you like. The Crop button (in the dotted circle on the left image) is perfect for this job. You click on Crop and then you form an area you want to cut out. Now you see the area and you can either move it or change the size of it by hand, or you can add specific proportions of the cropped area. In the Navigator, on your right, you see W (Width) and H (Height) changing as you alter your cropped area. When you finish on your cropped selection, you press Enter and you're done. But remember, this width and height is relevant to the picture's size. For example, let's say you wanted to crop the three faces of the image (Harry's, Ron's and Hermione's) in dimensions: W250 x H100. When you form your cropped area (the three faces), you would see that the width and height are not W250 x H100.
Crop Tool.
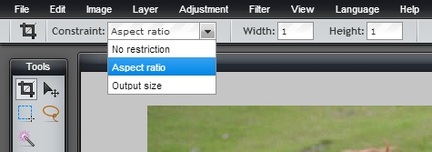
That's why there are two other cropping options: Aspect Ratio and Output Size. If you want your cropped area to have specific proportions then you have to choose the Output Size. It means that your cropped selection will have the dimensions you give.
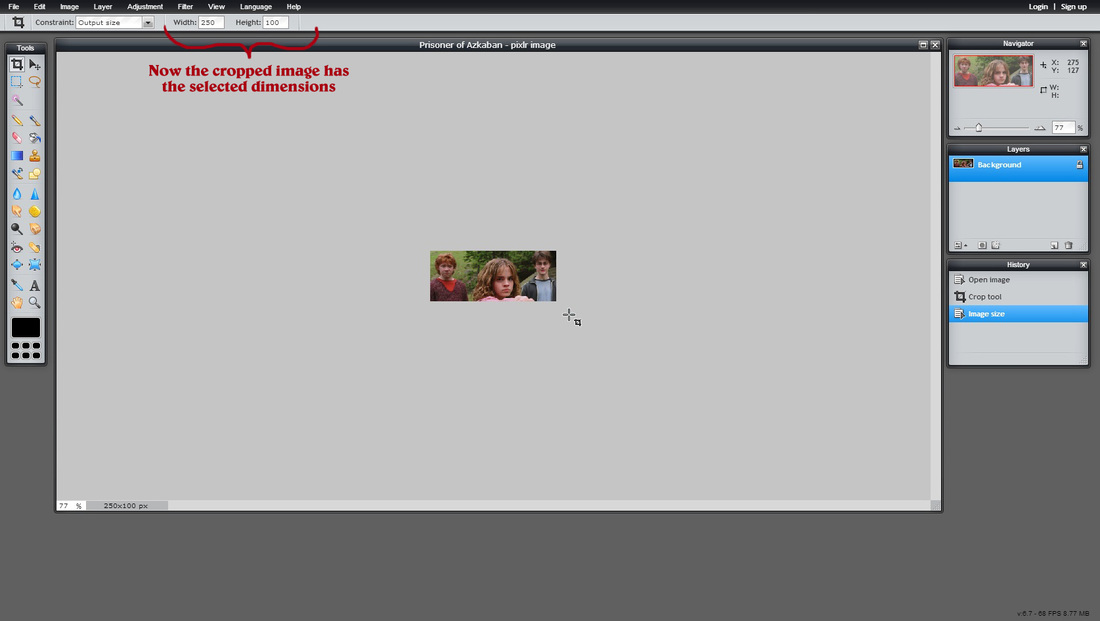
Crop Tool using Output Size.
Adding elements
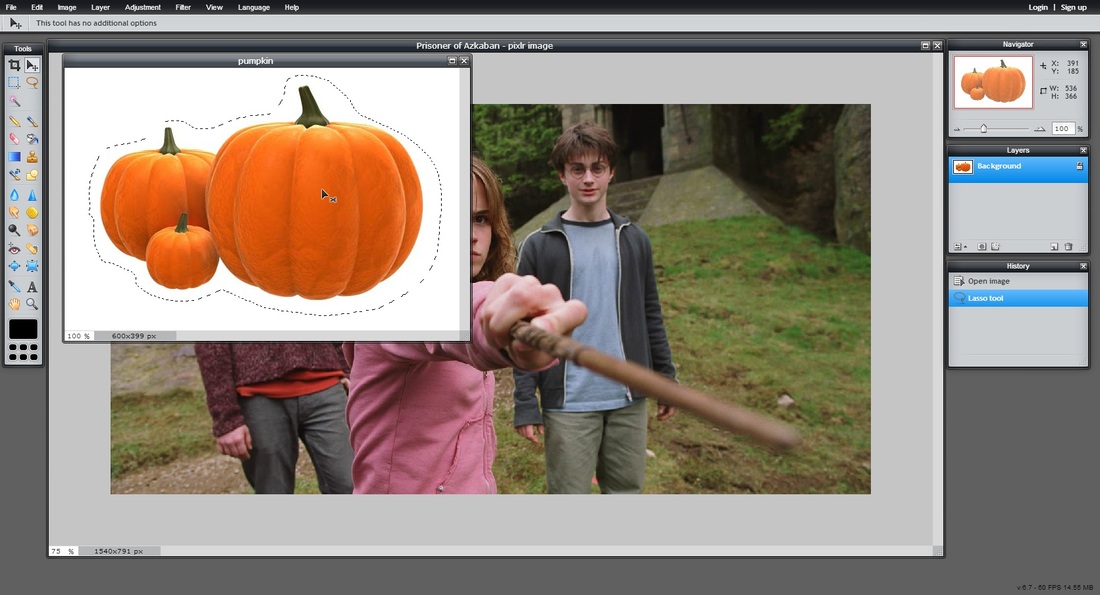
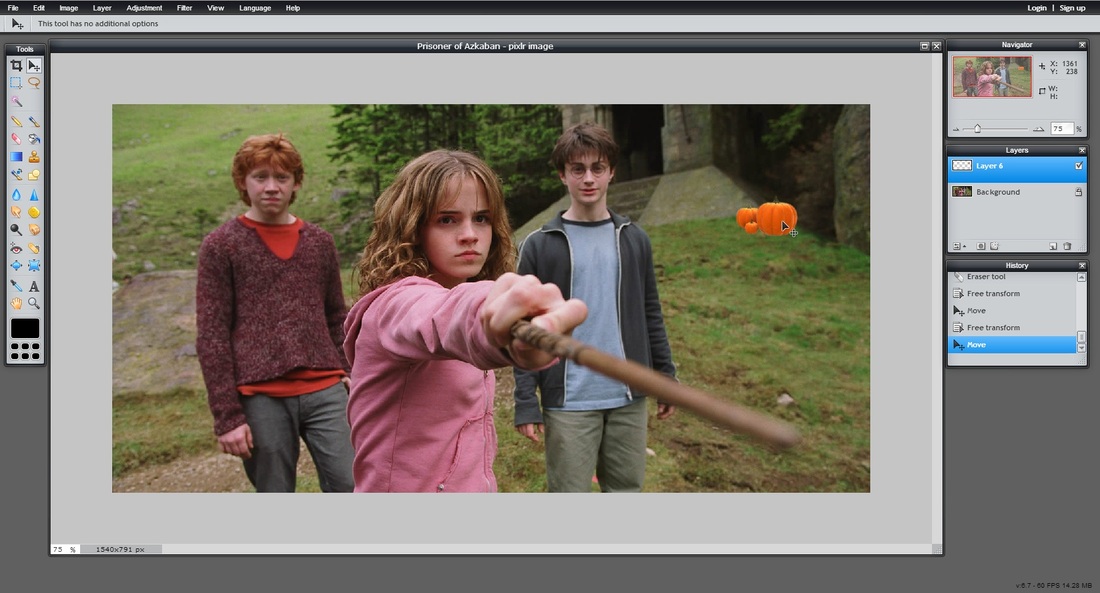
Now, let's say you want to add another picture to your image. First of all, you have to open this second picture. Then you have to select the area you want to be added in your first image. For example, I want to add some pumpkins in the big picture with the Trio.
Now, let's say you want to add another picture to your image. First of all, you have to open this second picture. Then you have to select the area you want to be added in your first image. For example, I want to add some pumpkins in the big picture with the Trio.
Select
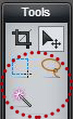
There are three selection tools in PIXLR. The Marquee Tool, the Lasso Tool and the Wand Tool. We may be wizards and witches, but the Wand Tool isn't always the best idea to select a specific area in a picture!
In my example, I chose the Lasso Tool. It allows me to select by hand any area I want. Now after you selected the area, you need to click on the Move Tool again (the arrow). Now if you move your mouse on the selected area, you will see that a scissors appeared. This means that I can cut this area and drag it to my big picture with the Trio.
Eraser Tool
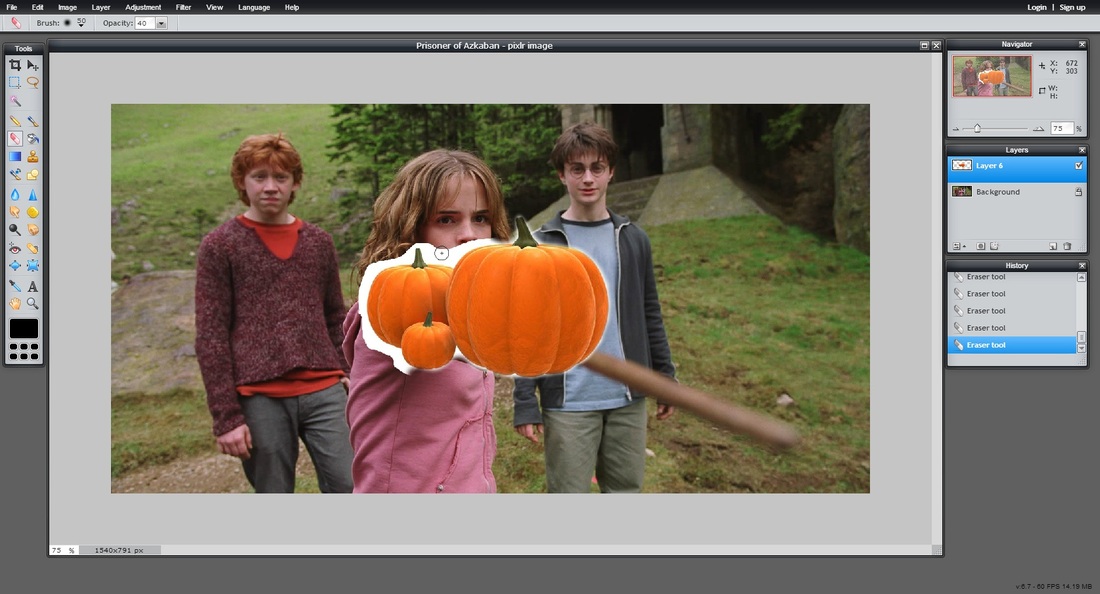
Only now, I have my pumpkins but I also have the white area around them. I don't need it! I can't just cast "Evanesco!" and it goes puff! No, I have to do it the Muggle way. So, the easiest way to remove the white, is the Eraser Tool. (There are plenty of options in Photoshop with which you can select an area and remove all the unwanted things, but we'll stick to PIXLR and an easy way of doing it.)
You click on the Eraser Tool and you change the opacity of the eraser. I don't want to erase some pumpkin as I erase the white area. Try it yourself.
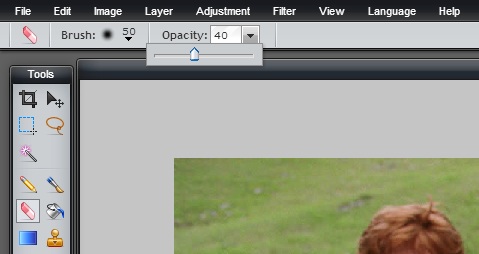
Changing the Opacity of the Eraser.
Eraser Tool.
Transform
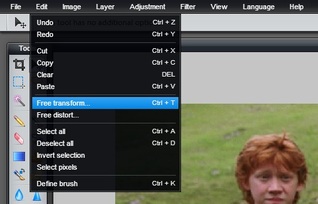
Now that I cleared all the unwanted things from my second picture, I want it to be smaller. Now click on the Edit Menu -> Free Transform. This will allow you to change the size of your second image or even rotate it and drag it to the place you want.
Now that I cleared all the unwanted things from my second picture, I want it to be smaller. Now click on the Edit Menu -> Free Transform. This will allow you to change the size of your second image or even rotate it and drag it to the place you want.

Free Transform holding Shift button will transform the picture by keeping the proportions stable.

While in Free Transform mode, moving your mouse in the edges of the image will also allow you to rotate.
While in Free Transform mode, you can always move the image around.
