guidelines: part ii
image manipulation
Image adjustments
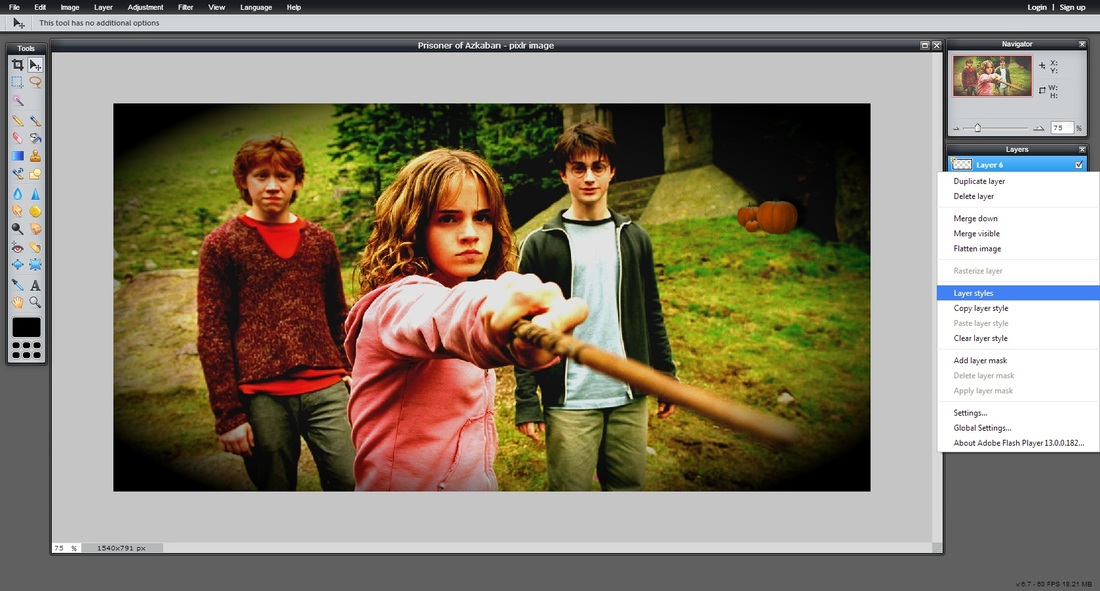
Now that I placed my pumpkins where I wanted, I want to make some adjustments in colours. Every time you want to change something in your image, you have to ask yourself: "Do I want to change the background image? Do I want to change an added image?" If I want to change something in my background image (the big one), then in the Layers list, this image must be selected. If I want to change something in another layer, then this layer must be selected. Now I want to play with the colours and tones of the Trio image. First of all, I select it from the Layers list. Then you can click on the Adjustment Menu and see a list of adjustments you can make.
You can play with colours and tones with the first seven adjustments, which allow you to see the preview of each change you make.
The rest of the adjustments (Invert, Sepia, Solarize, etc.) change the image completely. You can always go back, if you don't like your changes, in the History window on the right.
Now that I placed my pumpkins where I wanted, I want to make some adjustments in colours. Every time you want to change something in your image, you have to ask yourself: "Do I want to change the background image? Do I want to change an added image?" If I want to change something in my background image (the big one), then in the Layers list, this image must be selected. If I want to change something in another layer, then this layer must be selected. Now I want to play with the colours and tones of the Trio image. First of all, I select it from the Layers list. Then you can click on the Adjustment Menu and see a list of adjustments you can make.
You can play with colours and tones with the first seven adjustments, which allow you to see the preview of each change you make.
- Brightness & Contrast
- Hue & Saturation
- Color Balance
- Color Vibrance
- Levels
- Curves
- Exposure
The rest of the adjustments (Invert, Sepia, Solarize, etc.) change the image completely. You can always go back, if you don't like your changes, in the History window on the right.
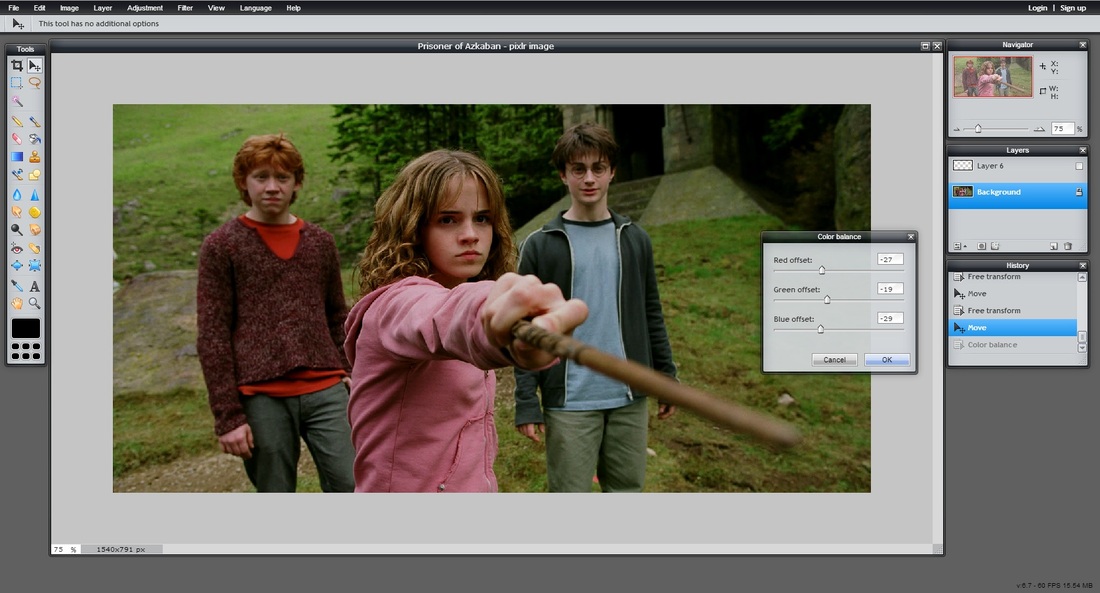
Altering Color Balance.
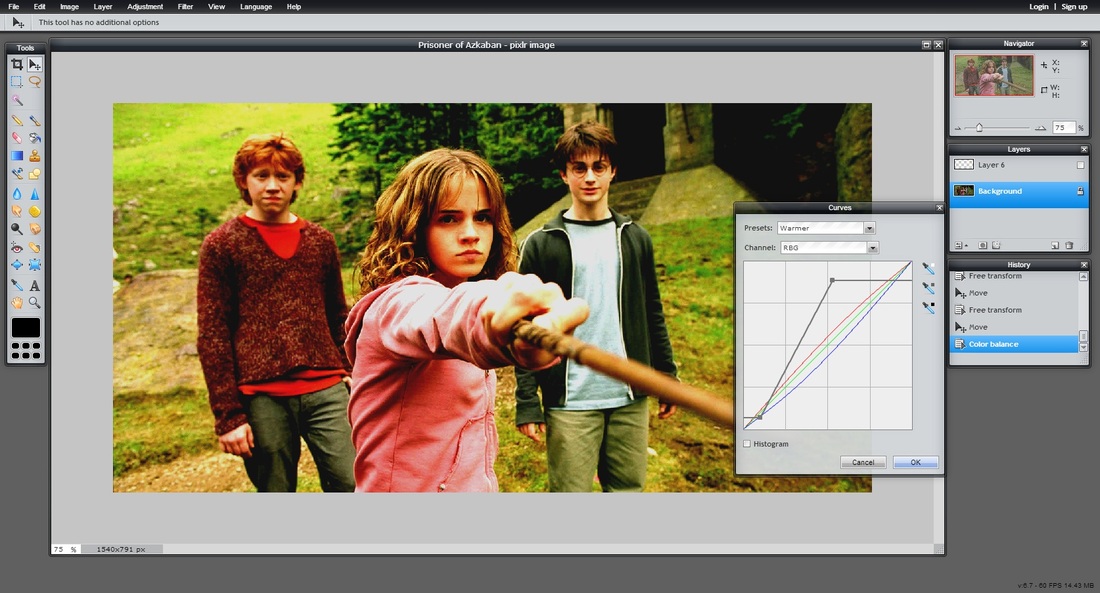
"Playing" with Curves.
Filters
In the Filter Menu, there are lots of different adaptations you can make to your image. (Blur, Sharpen, Noise, Vignette, Pastels, Emboss, etc.). Now, let's say you want to make an adjustment to everything you see, meaning to all layers together. There are two ways to do it.
1. By merging all layers to one and deal with the complete picture. But now, you won't be able to change anything else in the previous layers you had. So you have to be absolutely certain that these are the final changes you make to your layers and then you will have only ONE layer, the merged one.
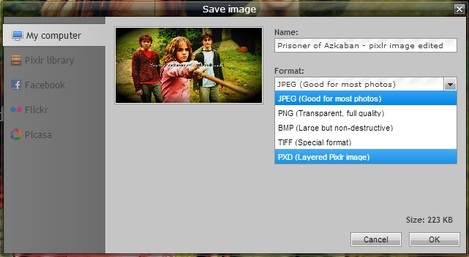
2. By saving your project as a JPEG and then by opening this JPEG image and change it in the way you like. BE CAREFUL: Firstly, you always save your project as a Layered PIXLR Image (PXD), so you can have your whole project WITH LAYERS saved, and then save it as a JPEG.
In the Filter Menu, there are lots of different adaptations you can make to your image. (Blur, Sharpen, Noise, Vignette, Pastels, Emboss, etc.). Now, let's say you want to make an adjustment to everything you see, meaning to all layers together. There are two ways to do it.
1. By merging all layers to one and deal with the complete picture. But now, you won't be able to change anything else in the previous layers you had. So you have to be absolutely certain that these are the final changes you make to your layers and then you will have only ONE layer, the merged one.
2. By saving your project as a JPEG and then by opening this JPEG image and change it in the way you like. BE CAREFUL: Firstly, you always save your project as a Layered PIXLR Image (PXD), so you can have your whole project WITH LAYERS saved, and then save it as a JPEG.
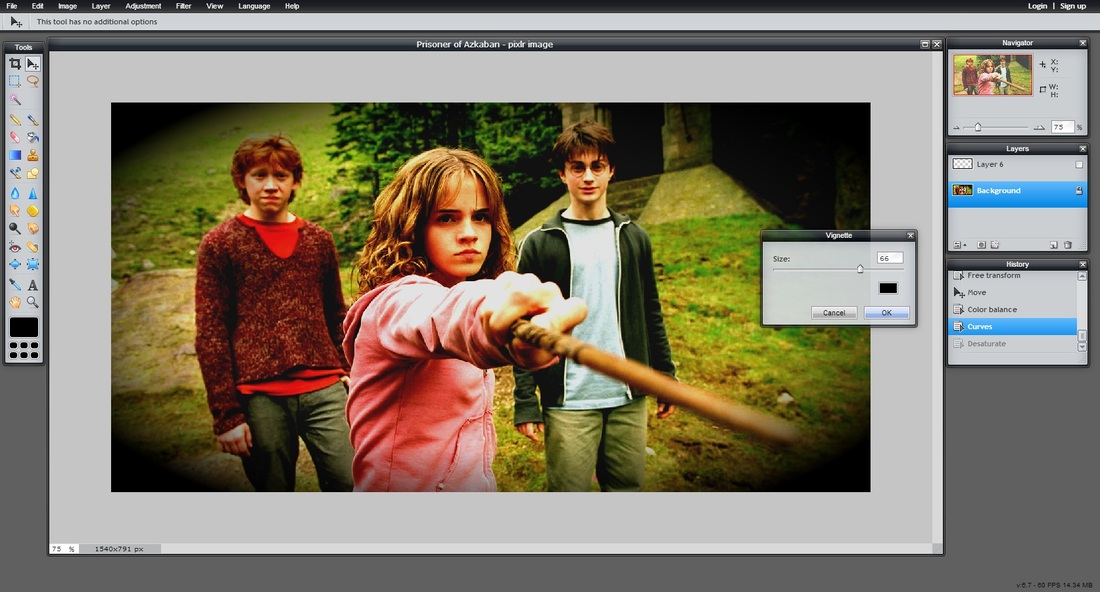
Image adaptations using Vignette.
Layer styles
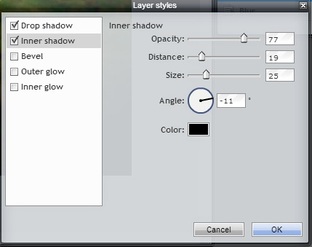
There are some changes you can make to a layer, like Drop Shadow or Outer Glow. These belong to the Layer Styles, which you can access by Right-Clicking on a layer -> Layer Styles. I used some of them to make the pumpkins of the example like they belong to the big picture.
There are some changes you can make to a layer, like Drop Shadow or Outer Glow. These belong to the Layer Styles, which you can access by Right-Clicking on a layer -> Layer Styles. I used some of them to make the pumpkins of the example like they belong to the big picture.
Layer Styles.
Text
Now let's say you finished with all the image's adjustments, but there's something missing. A text! You click on the "A" button from the Tools in the left. You Left-Click once in your picture area and a box appears. Now you enter your text, you choose a font, a size, a style, a color, an alignment and you click OK. You can move your text wherever you want, as long as the text's layer is selected. Now again you can play with the Layer Styles to make your text to your likings.
Now let's say you finished with all the image's adjustments, but there's something missing. A text! You click on the "A" button from the Tools in the left. You Left-Click once in your picture area and a box appears. Now you enter your text, you choose a font, a size, a style, a color, an alignment and you click OK. You can move your text wherever you want, as long as the text's layer is selected. Now again you can play with the Layer Styles to make your text to your likings.
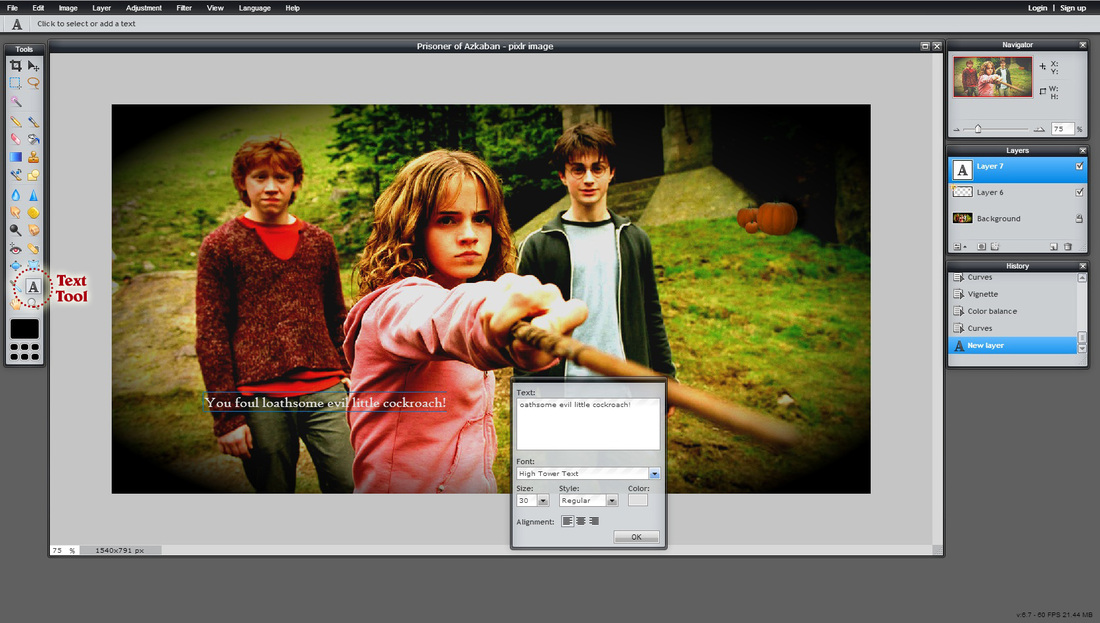
Using Text Tool.
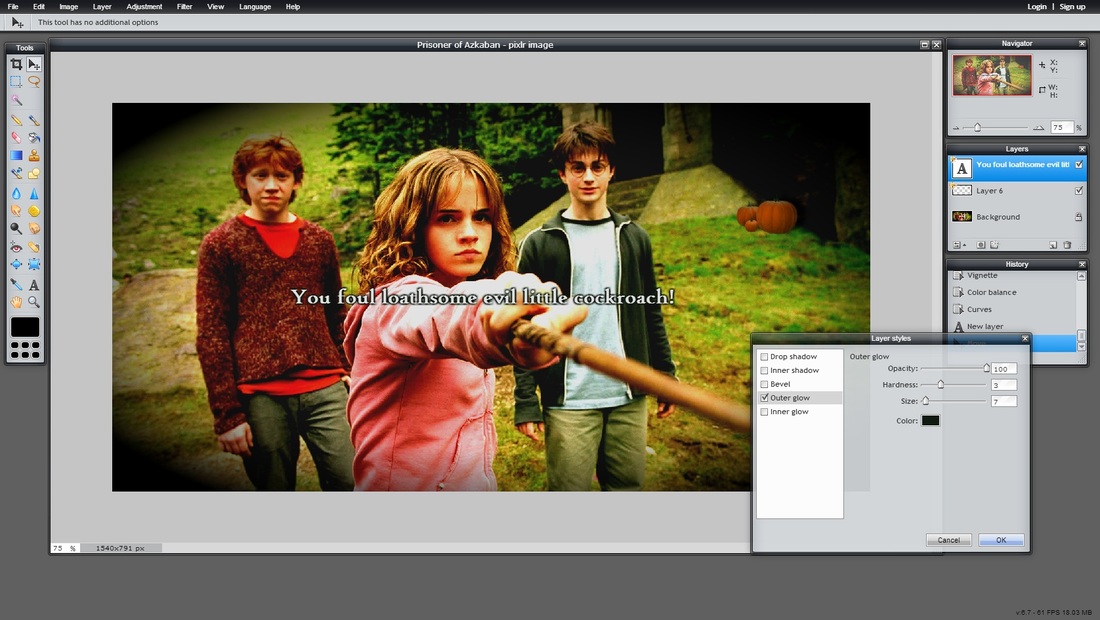
Layer Styles of the text.
Save
Remember to always save your project so that all your work won't disappear, in case a specific poltergeist (Peeves!) decides to steal it! You click on the File Menu -> Save and then you firstly save it as a Layered Image, that you can always alter whenever you want, and then if you are done with your project, save it as a JPEG so that you can send your submission.
Remember to always save your project so that all your work won't disappear, in case a specific poltergeist (Peeves!) decides to steal it! You click on the File Menu -> Save and then you firstly save it as a Layered Image, that you can always alter whenever you want, and then if you are done with your project, save it as a JPEG so that you can send your submission.
